Published: September 29, 2026
Last Updated: September 29, 2026
Recording gameplay is more demanding than simply capturing a desktop. Your PC has to run the game while also capturing frames, encoding video, processing audio and writing the recording to storage.
The right screen recording software for gaming should therefore give you enough quality and control. Without creating unnecessary performance problems. Your best option depends on your hardware and the games you play. Whether you need commentary matters too. So does how you plan to use the finished video.
Quick Answer: Good gaming recording software should support reliable game capture. Hardware encoding, when available. Suitable resolution and frame-rate controls. Separate game and microphone audio when needed. To reduce performance problems, leave some GPU headroom. Avoid unnecessarily high recording settings. Match the recording resolution and frame rate to your intended use.
What Makes Good Gaming Recording Software?
Gaming recording software needs to do more than capture what is visible on your monitor. It must work alongside a game that may already be using a large share of your system resources.
Look for these capabilities:
- Game capture: The software should capture the game reliably. No unnecessary desktop elements.
- Hardware encoding: A GPU-based encoder can reduce CPU workload during recording, if your hardware and recorder support it. OBS Studio offers hardware encoder options. NVIDIA NVENC, AMD hardware encoding, and Intel Quick Sync, when they are available on the system.
- Resolution and frame-rate controls matter too. You should be able to choose settings appropriate for your game and hardware.
- Audio controls? The software should let you capture game audio and, when required, microphone commentary.
- Replay or background recording: Useful when you want to save an unexpected moment after it happens.
- Storage is the other thing to watch. High-quality recordings can consume substantial disk space, so look for reasonable storage controls.
- Reliable game compatibility: A recorder is only useful if it can capture the games you actually play.
You do not always need a dedicated third-party application. Windows includes Xbox Game Bar for game recording, NVIDIA provides recording features through the NVIDIA App on supported hardware, and Steam offers its own Game Recording feature, including background and on-demand recording options.
For a broader look at your options, see our screen recording software guide.
How to Record Gameplay Without Losing FPS
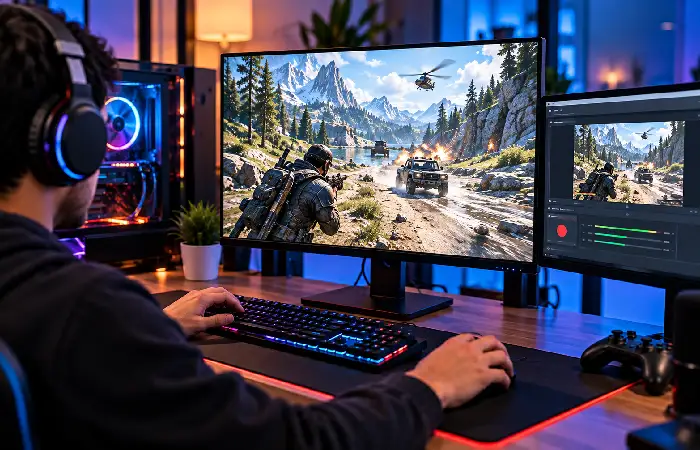
Recording can affect game performance because the game and recorder may compete for system resources.
OBS explains that its own rendering and encoding require GPU resources, and recommends leaving enough capacity available when recording. Limiting the game’s frame rate or reducing graphics settings can help when the GPU is overloaded.
A practical starting workflow is:
1. Use hardware encoding when your system supports it
Hardware encoders are designed to handle video encoding using dedicated hardware on supported GPUs. OBS explains that hardware encoders move the encoding workload away from the CPU to a specialized component in the GPU and generally recommends them when available for better recording performance. See the official OBS hardware encoding guide for supported encoder options and compatibility details.
For example, supported systems may offer:
- NVIDIA NVENC
- AMD hardware encoding
- Intel Quick Sync
The exact encoder available depends on your hardware and software.
2. Leave some GPU headroom
If the game is already pushing your GPU close to its limit, adding recording work can cause problems.
Start by monitoring your game while recording. If you notice unstable FPS, stuttering or recording frames being dropped, try:
- limiting the game’s FPS
- lowering demanding graphics settings
- reducing the recording resolution
- reducing the recording frame rate
- simplifying the recording scene
OBS specifically recommends limiting the game’s frame rate and reducing graphical settings when the game and recording workload compete for GPU resources.
3. Avoid recording at higher quality than you need
A 4K recording isn’t automatically better for every project. Say the finished video will be watched at 1080p. Recording at a much higher resolution can increase the workload and storage requirements. With no useful benefit for your particular workflow.
Start with the output you actually need. Increase quality only when your system can handle it comfortably.
4. Keep the recording setup simple
With software such as OBS, every additional source can add some processing work. OBS recommends limiting expensive sources and avoiding unnecessary complexity when resources are limited.
For gameplay recording, you may only need:
- Game Capture
- Desktop or game audio
- Microphone
- Optional webcam
You do not need a complicated scene if your goal is simply to record gameplay.
5. Test before recording a long session
Make a short test recording before starting a major gaming session.
Check:
- Game FPS
- Recording smoothness
- Audio levels
- Microphone quality
- Video resolution
- File size
- Storage location
A five-minute test can reveal a configuration problem before it ruins an entire recording session.
Best Resolution and Frame Rate for Game Recording
There is no single resolution or frame rate that is correct for every gaming video.
Your choice should depend on the game, hardware, display, editing workflow and destination.
| Recording goal |
Practical starting point |
| Smaller files or weaker hardware |
720p at 30 or 60 FPS |
| General gameplay videos |
1080p at 60 FPS |
| Higher-quality gameplay |
1440p at 60 FPS if hardware allows |
| High-resolution capture |
4K at 60 FPS or higher when the system and workflow support it |
These are starting points, not universal requirements.
1080p vs. 1440p vs. 4K
1080p is a practical choice for many gameplay videos because it offers a good balance between image detail, performance and file size.
1440p provides additional detail and can be useful for games with small interface elements or detailed environments, but it increases the amount of data being recorded.
4K can produce highly detailed footage, but it also increases recording and storage demands. It makes more sense when your hardware and editing workflow are designed around high-resolution footage.
30 FPS vs. 60 FPS
Gameplay footage from fast-moving games can appear smoother at 60 FPS than at 30.
Recording at 60 FPS asks the system to capture twice the frames per second of a 30 FPS recording. PC struggling? A stable 30 FPS recording may be preferable rather than one that stutters or drops frames at 60.
Don’t simply select the largest number. Stable footage that matches the game and the final use is the goal.
How to Record Game Audio and Commentary
Good gameplay footage can lose much of its value if the audio is poorly configured.
At a basic level, you may want to capture:
- Game audio
- Your microphone
- Optional voice-chat audio
- Optional music or other application audio
Xbox Game Bar can record supported games and apps on Windows, and you can toggle your microphone during recording. Use Windows + Alt + R to start or stop recording and Windows + Alt + M to turn microphone capture on or off. Review the available capture and audio settings in Game Bar before recording.
For more advanced workflows, OBS Studio can record multiple audio tracks when you use Advanced Output mode and assign audio sources to separate recording tracks. This can keep game audio and microphone commentary separate for independent adjustment during editing.
This can be especially useful when creating YouTube gameplay videos.
For example, you could keep:
- Track 1: combined recording mix
- Track 2: game audio
- Track 3: microphone
- Track 4: communication or another audio source
That approach gives you more control during editing than recording everything into a single audio track.
Check microphone levels before starting
Your microphone should be clearly audible without overpowering the game.
Make a short test recording and listen to it with headphones. This is more reliable than assuming the default audio levels will work correctly.
How to Choose Gaming Screen Recording Software
The right software depends on what you want to do.
Choose a flexible recorder when you need control
OBS Studio is suited to users who want detailed control over scenes, capture sources, encoders and audio. Its documentation provides dedicated guidance for recording settings, hardware encoders and multiple audio tracks.
It can therefore make sense when you want to record gameplay and later expand into streaming, webcam layouts or more advanced production.
Choose a GPU-based recorder when simplicity matters
Using compatible NVIDIA hardware and the NVIDIA App? Its in-game overlay can provide manual recording and Instant Replay features. Available codecs, resolutions, frame rates, and recording options vary by GPU generation, driver, and NVIDIA App version. Check NVIDIA’s current documentation for your system. Do that before relying on a specific setting.
Handy if you mainly want to save gameplay clips. No complicated recording setup needed.
AMD users can use the recording features in AMD Software: Adrenalin Edition, on compatible systems. Recording formats, codec support, microphone controls, and other capture options vary by GPU model and driver version. They also vary by operating system and software configuration.
Choose Windows’ built-in recorder for simple recording
If you use Windows and only need straightforward game recording, Xbox Game Bar may be enough.
Microsoft documents Windows + Alt + R as the shortcut to start or stop a recording, with Windows + Alt + M for microphone control. Recordings are saved as MP4 files in the Captures folder.
You can also explore our guide to a screen recorder for Windows if you want to compare built-in and third-party options.
Consider Steam Game Recording for Steam games
Steam Game Recording offers two modes: Record in Background, which continuously captures gameplay within your selected limits, and Record On Demand, which records only when you turn it on.
Steam provides controls for recording behavior and saved clips within the Steam Client. It is most relevant for players who launch and manage their games through Steam, rather than users who need a general-purpose desktop recorder for any application.
This makes it worth considering if most of your games are already played through Steam.
A Simple Gaming Recording Workflow
Unsure where to begin? Use this sequence.
- Choose the recording method based on your hardware and game platform.
- Hardware encoding next, if your recorder and hardware support it.
- Start with 1080p and 60 FPS. If your system can maintain stable performance.
- Recording causes noticeable performance problems? Drop to 720p or 30 FPS.
- Configure the game and microphone audio before starting.
- Then record a short test clip.
- Check the result for FPS drops, stuttering, audio problems, and file size.
- Adjust one setting at a time. Keep going until the recording is stable.
What matters is a stable recording. Not simply the highest available quality.
Conclusion
The best screen recording software for gaming? It depends on how you play and what you want to create. OBS Studio is flexible and can provide extensive control. NVIDIA, AMD, Windows and Steam offer simpler recording workflows for supported systems.
For smooth gameplay, focus first on hardware encoding, available GPU headroom, sensible resolution and frame rate, and properly configured audio. Start with moderate settings. Test a short clip. Then increase quality, but only when your system can maintain stable gameplay and recording performance.
If you are comparing options beyond gaming, our screen recorder for PC guide covers the wider PC recording use case.