Published: September 28, 2026
Last Updated: September 28, 2026
You don’t always need complicated software to record what’s happening on your computer. Built-in screen-recording options come with Windows. Dedicated screen recorders? More control over the capture area, audio, webcam, editing and sharing.
Quick answer: Pick a capture tool. It has to support the part of the screen you need. Configure system audio or your microphone if required. Then start recording and review the saved video. On Windows, Snipping Tool and Xbox Game Bar can handle simple recordings. OBS Studio, though, provides more advanced control.
What Is a Screen Recorder for PC?
A screen recorder for PC is software that captures activity displayed on your computer and saves it as a video.
Depending on the tool, you may be able to record:
- The entire screen
- A particular application window
- A selected area
- A game
- Your webcam
- System audio
- Microphone audio
The right option depends on what you are trying to create.
For example, a quick recording showing a software problem may only need screen video and system audio. A tutorial may also need your microphone and webcam. A gaming or production workflow may require multiple video sources, audio controls and more detailed recording settings.
Dedicated tools can also add features for editing, sharing and organising recordings. Collaboration too, in some cases. Others focus mainly on capturing and saving video files.
How to Record Your PC Screen Step by Step
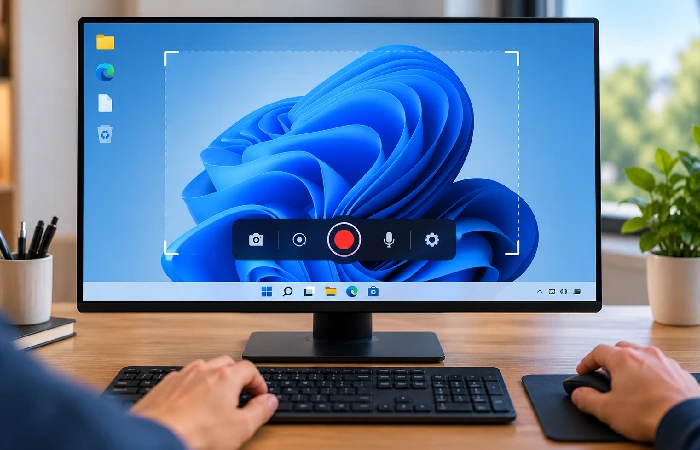
The basic recording process is similar across most screen-recording tools.
1. Decide what you need to capture
Before opening the recorder, decide whether you need:
- The whole screen
- One application
- A selected area
- A game
- Your webcam
- System audio
- Your microphone
This prevents you from recording unnecessary content or discovering afterward that an important audio source was missing.
2. Choose your recording method
For a quick Windows recording, you can use a built-in option.
Microsoft’s Snipping Tool has a Video snip option. Select a rectangular area of the screen and it captures that area as a video.
Xbox Game Bar is another Windows option for recording a game or an active app. Press Windows + Alt + R to start or stop recording. By default, recordings are saved as MP4 files in the Videos > Captures folder. However, Xbox Game Bar is not designed to record the Windows desktop or File Explorer, so use Snipping Tool or another recorder when you need to capture those areas.
For more advanced recording, a dedicated application such as OBS Studio lets you build scenes from different sources, including display capture, window capture, game capture and webcams.
3. Select the capture area
Choose the area that contains the information you want to show.
Common options include:
| Capture option |
Useful for |
| Full screen |
Demonstrations involving several applications |
| Selected area |
Tutorials focused on one part of the screen |
| Application window |
Showing one program without unrelated desktop activity |
| Game capture |
Recording gameplay |
| Webcam |
Presenter videos and demonstrations |
The available options depend on the recording tool.
4. Configure audio
If sound matters, check the audio settings before pressing Record.
You may need:
- System audio for sounds produced by the computer
- Microphone audio for your narration
- Both for tutorials, demonstrations or presentations
Do a short test recording before an important session. This is particularly useful because a recording can look correct while still having the wrong audio source.
OBS’s official quick-start documentation recommends checking the audio meters and testing recording settings before creating the final recording.
5. Start recording
Start the recording and perform the actions you want to capture.
Try to avoid unnecessary movement between windows. If you are making a tutorial, move through the process at a pace that gives viewers enough time to follow each step.
6. Stop and review the recording
Stop the recording when you are finished.
Then check:
- Video quality
- Correct capture area
- System audio
- Microphone audio
- Webcam position, if used
- Beginning and ending of the recording
Do not assume a successful recording command means the final video is usable. A short review can catch missing audio or an incorrect capture source before you share the file.
How to Record Screen and Audio Together
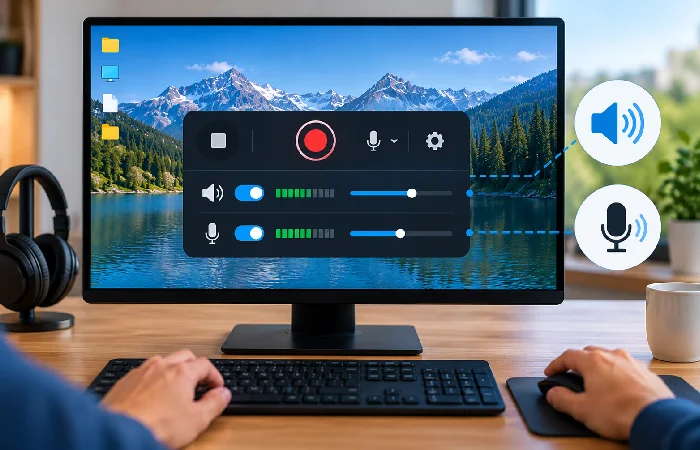
Recording the screen and audio together is useful for tutorials, demonstrations, presentations, gameplay and troubleshooting videos.
There are two main audio sources to consider.
System audio
System audio is sound produced by the computer, such as:
- Video playback
- Application sounds
- Game audio
- Browser audio
- Other computer-generated sounds
Microphone audio
Microphone audio records your voice or another sound source connected to the PC.
You may need one or both.
For example:
Software tutorial: screen + microphone + optional system audio
Gameplay: game capture + system audio + microphone
Troubleshooting video: screen + system/application audio + microphone
Presentation: screen + microphone
OBS Studio can capture desktop audio and microphone input when those devices are enabled and correctly configured in its audio settings. Check the Audio Mixer meters during a short test recording to confirm that each source is being captured.
Test audio before an important recording
Make a short test clip and listen to it before recording the full session.
Check that:
- Your voice is audible.
- System audio is captured if required.
- Neither source is excessively loud.
- The recording does not contain unwanted background sound.
- The correct microphone is selected.
This simple check can save you from having to repeat a long recording.
What Features Should a PC Screen Recorder Have?
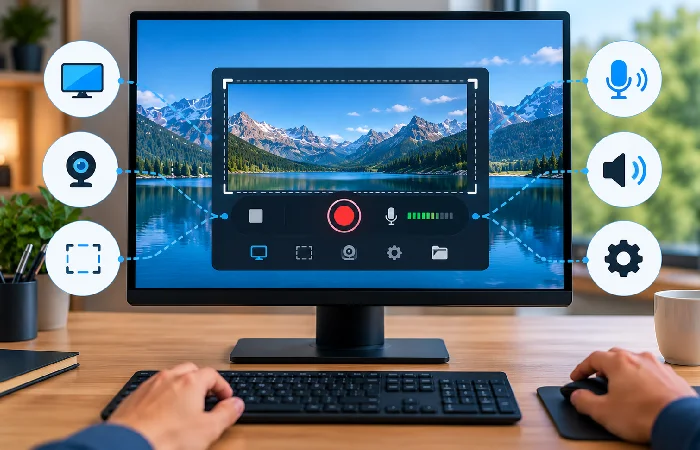
Not everyone needs the same features. Focus on the capabilities that match your recording task.
1. Flexible capture options
A useful screen recorder may offer several capture modes.
Look for the ability to capture:
- Full screen
- Selected area
- Application window
- Games
The more specific your recording needs are, the more important capture flexibility becomes.
2. Audio controls
If your recordings include narration or application sounds, check whether the software supports the audio sources you need.
Some tools provide more detailed controls than others.
OBS, for example, provides an audio mixer and per-source audio controls.
3. Webcam recording
A webcam can be useful when you are explaining a process and want viewers to see the presenter.
It is particularly useful for:
- Online lessons
- Presentations
- Video tutorials
- Product demonstrations
- Training videos
You do not need webcam recording for every screen capture, so it should be considered a requirement only when your content needs it.
4. Video quality controls
The required quality depends on the purpose of the recording.
A short troubleshooting clip may not need the same settings as a polished tutorial or gameplay recording.
Advanced applications can provide more control over recording settings. OBS’s documentation includes separate guides for recording output, encoders and advanced recording settings.
5. Editing tools
Basic recording and video production are different needs.
If you only need to capture a quick demonstration, editing may not matter.
For longer tutorials, however, you may want to:
- Trim unwanted sections
- Remove mistakes
- Highlight important areas
- Adjust audio
- Add other visual elements
Some dedicated applications combine recording and editing. For example, TechSmith’s Camtasia supports screen, camera, microphone and system-audio recording alongside editing-oriented features.
6. Easy sharing
If recordings are mainly created to send to coworkers, customers or students, sharing can be as important as recording.
Some tools focus heavily on quick recording and sharing, while others primarily save local video files for later editing.
Loom, for example, positions screen recording around recording, sharing and collaboration workflows.
7. Performance and compatibility
Screen recorders use system resources while capturing video. Software first. Does it support your operating system? Then look at the recording settings you plan to use. Can your PC handle them?
For example, OBS Studio provides Windows installation requirements on its official download page. Check the current requirements before installing because supported operating system versions can change over time.
How to Choose a Screen Recorder for Your PC
There is no single feature set that makes a recorder suitable for every PC user.
Instead, match the software to the job.
| Your need |
What to look for |
| Quick screen clip |
Simple built-in recording |
| Selected screen area |
Region or rectangular capture |
| App demonstration |
Window or display capture |
| Gameplay |
Game capture and suitable performance controls |
| Tutorial with narration |
Screen + microphone |
| Tutorial with computer sounds |
Screen + system audio |
| Presenter video |
Screen + webcam + microphone |
| Advanced production |
Multiple sources, scenes and audio controls |
| Record, edit and share |
Integrated recording and editing/sharing |
Built-in Windows tools vs dedicated software
The difference is mainly about control.
Built-in tools work when you want a straightforward recording. No complete production workflow to set up. Dedicated screen-recording software gets more useful when you need more control. Sources, audio, webcam, recording settings, editing or sharing.
Windows’ own tools already provide video capture options, so installing third-party software is not automatically necessary.
When OBS Studio makes sense
OBS Studio is designed for users who need more control over their recording or streaming setup.
Its official documentation supports workflows involving:
- Display Capture
- Window Capture
- Game Capture
- Webcam/video capture
- Multiple scenes
- Audio sources
- Recording configuration
The trade-off is that a more configurable application can take longer to learn than a simple built-in recorder.
When a simpler tool makes sense
If your main goal is to record a short explanation and send it to someone, a complicated multi-source setup may add unnecessary work.
In that situation, prioritize:
- Fast startup
- Simple capture controls
- Reliable audio
- Easy saving
- Easy sharing
The best choice depends on the workflow rather than the number of features listed on a product page.
Common Screen-Recording Problems
The recording has no sound
Check whether the recorder is capturing:
- System audio
- Microphone audio
- The correct audio device
Make a short test clip before starting again.
Your microphone is not recorded
Check the selected input device and make sure microphone capture is enabled.
Also verify that the microphone level changes when you speak.
The wrong part of the screen is recorded
Review the capture source before starting.
Depending on the software, you may need to choose the display, window, application or selected region again.
The recording looks poor
Review the recording resolution and other video settings.
If the recording is demanding too much from the PC, you may need to adjust the recording configuration rather than simply selecting the highest available quality.
The software feels too complicated
Start with the simplest workflow that satisfies your needs.
You do not need advanced scenes, multiple sources or extensive audio controls to make a short screen recording.
A Simple PC Screen-Recording Checklist
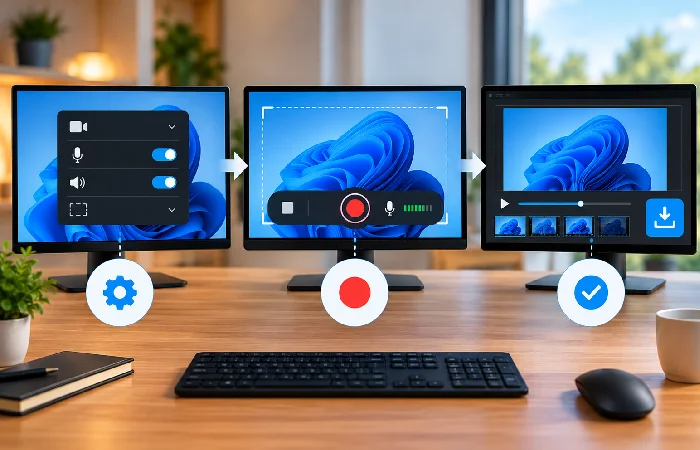
Before recording, check:
- Correct screen or window selected
- Microphone selected if narration is needed
- System audio enabled if required
- Webcam enabled if required
- Recording quality selected
- Enough storage available
- Unwanted notifications closed
- Short test recording completed
After recording:
- Video plays correctly
- Audio is present
- Important content is visible
- Beginning and ending are clean
- File is saved where expected
Final Takeaway
A screen recorder for PC does not have to be complicated.
For a quick Windows capture, built-in tools such as Snipping Tool or Xbox Game Bar may be enough. Microsoft documents video capture in Snipping Tool and screen recording through Xbox Game Bar, including the Windows + Alt + R shortcut and MP4 output location.
For more advanced work, dedicated software can provide additional control over capture sources, audio, webcam recording, scenes, editing and sharing. OBS is one example of a configurable recording platform, while other tools focus more heavily on editing or collaboration workflows.
The practical approach is simple: choose the least complicated tool that provides the capture area, audio and other features your recording actually needs.
If you want to explore the broader category, see our guide to screen recording software.