Published: September 27, 2026
Last Updated: September 27, 2026
Quick Answer: Screen recording software captures whatever’s happening on your display and saves it as a video. What you can actually record depends on the tool – full display, a single window, one application, or just a selected area. Audio’s flexible too, pulling from the microphone, the system, or a specific application.
Screenshots can’t always show the full process. That’s where screen recording earns its place. Tutorials. Explaining a software problem someone’s hitting. Demonstrating a product. Recording a lesson, or just capturing gameplay – all of it fits.
Windows already has options built in. The Snipping Tool in Windows 11 can record a selected area. Xbox Game Bar takes a different angle, handling app or game capture instead. Dedicated software goes further, though. Multiple sources at once. Finer audio control. A webcam layered into the recording. Real editing tools. Settings more detailed than anything built into Windows.
Screen recording software captures activity. From a display, or from one specific application. It saves that as a video. Add microphone audio, system audio, application audio – most tools let you layer those in too.
What Is Screen Recording Software and How Does It Work?
Visual activity on your screen, turned into a video – that’s the basic job screen recording software does. What it actually captures depends on the application. The full display. One window. A game. A single application. Or just a selected region.
The basic workflow is straightforward:
- Choose what to capture. Select a display, window, application, game or screen region.
- Choose audio sources. Depending on the software, this can include microphone, desktop audio or audio from a particular application.
- Set recording options. Resolution, frame rate, output format and other settings may be available.
- Start recording.
- Stop and save the recording.
- Edit or share it if the software includes editing tools or you use a separate editor.
The important difference between screen recorders is not simply whether they can record video. It is what they can capture at the same time and how much control they give you over the recording.
For example, OBS Studio supports display, window and game capture, along with microphones, desktop audio and other sources. Its official documentation also recommends making a short test recording before starting an important session.
Screen Recorders for PC and Windows
Windows users have several ways to record their screens without immediately installing a separate application.
| Option |
Best suited for |
Main limitation |
| Snipping Tool |
Selected-area recordings on Windows 11 |
More focused on simple captures than advanced production |
| Xbox Game Bar |
Quick app and game recordings |
Designed around app/game capture rather than a full production workflow |
| OBS Studio |
Advanced recording, gaming and multiple sources |
More settings require more setup |
| Dedicated recorder/editor |
Tutorials, demonstrations and editing workflows |
Features and pricing vary by product |
Microsoft documents video recording in Snipping Tool on Windows 11. You can select Record, choose a screen area and start recording. A recording can then be saved or opened in Clipchamp for further editing.
Xbox Game Bar is another built-in option. Microsoft documents how to record with Xbox Game Bar using Windows + Alt + R to start and stop a recording. You can also use Windows + Alt + M to turn the microphone on or off while recording. Resulting recordings are typically saved in the Videos\Captures folder.
For more advanced workflows, OBS Studio supports multiple capture sources, including displays, windows, games, webcams and audio sources. OBS describes itself as free and open-source software for video recording and live streaming.
Built-in recording features can vary by Windows version and by the installed app version. Before relying on Snipping Tool or Xbox Game Bar for an important recording, check the available controls on your device and make a short test recording.
Which Windows recording method should you use?
For a quick selected-area recording on Windows 11, Snipping Tool is a practical starting point. For a quick recording of a supported app or game, Xbox Game Bar is simpler. For scenes, multiple sources or more detailed audio control, OBS Studio provides substantially more configuration.
The choice should therefore start with what you need to capture, rather than with the number of features a recorder advertises.
How to Record Your Screen With Audio
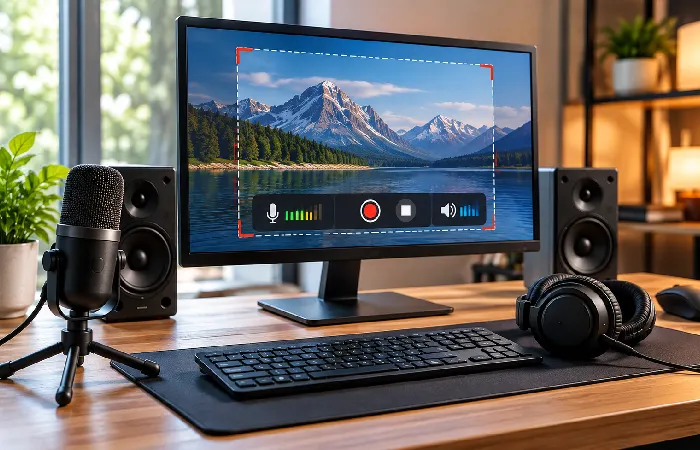
Recording the picture is only one part of the process. You also need to decide whether you want microphone audio, computer audio, application audio, or more than one source.
Microsoft’s Xbox Game Bar documentation shows how to include computer audio and toggle the microphone while recording.
A simple workflow is:
- Decide which audio you need. Your voice and computer-generated sound are separate sources.
- Select the recording area or application.
- Enable the required audio source.
- Make a short test recording.
- Play the test back before recording the full video.
- Check the final recording for both video and audio.
The test recording matters because a screen can look correct while the audio source is wrong or missing. OBS’s official quick-start documentation specifically recommends testing recording settings before an important recording.
Recording system audio and microphone audio
System or desktop audio is sound produced by the computer or an application. Microphone audio is your spoken narration or other sound entering through the selected microphone.
OBS provides separate audio controls and can use Application Audio Capture to capture audio from a selected application. This can be useful when you need greater control over which applications contribute sound to the recording.
If you hear an echo, check whether the same audio source is being captured through more than one route. OBS specifically notes that using application audio capture alongside global desktop audio can require configuration to avoid duplicated audio.
Screen Recording for Tutorials and Gaming
The right recording setup depends heavily on what you are creating.
For tutorials
Clear text. Visible cursor movement. Narration that actually makes sense. Tutorials tend to need all three. A simple selected-area recording covers a short demo just fine. Once you’re juggling several sources, or you actually care about controlling audio and presentation properly, that’s when a more advanced recorder starts pulling its weight.
For software tutorials, record only the area the viewer needs to see when possible. This reduces distractions and keeps the important interface elements visible.
A useful tutorial workflow is:
- Open the application you want to demonstrate.
- Prepare the exact starting point.
- Select the required recording area.
- Check microphone and system audio.
- Make a short test recording.
- Record the procedure at a steady pace.
- Stop the recording.
- Review the video before publishing.
If your tutorial depends on small interface elements, make sure the final video keeps those elements readable. Higher resolution can help when the software interface contains small text, but the correct setting depends on the display and intended output.
For gaming
Gaming recordings place different demands on screen recording software. You may need game capture, microphone narration, desktop audio, webcam footage or multiple audio sources.
OBS provides a dedicated Game Capture source on Windows and describes it as a way to capture 3D games with high performance. It also supports separate sources for displays, windows, webcams and audio.
Xbox Game Bar can be useful for quick game clips. Microsoft documents its recording controls and system-audio options for Windows 10 and Windows 11.
For longer gaming sessions, do a short recording first. Check the game footage, microphone level and computer audio before committing to a full session.
Tutorial recording vs. gaming recording
| Requirement |
Tutorials |
Gaming |
| Capture area |
Window or selected region often works |
Game or display capture |
| Audio |
Microphone is often important |
Game audio and microphone may both matter |
| Cursor |
Usually useful |
Usually less important |
| Webcam |
Optional |
Often used for commentary |
| Advanced scenes |
Useful for polished lessons |
Useful for streams and gameplay content |
| Simple built-in tools |
Often sufficient for basic tasks |
Useful for quick clips |
The key distinction is control. A basic recorder may be enough for a five-minute software demonstration, while a gaming workflow with several audio and video sources can benefit from software designed for multiple sources.
How to Choose Screen Recording Software for Your Needs
Start with the recording you actually need to produce. Dozens of settings don’t automatically make a recorder the better fit. Not if all you need is a small section of your screen.
Consider these factors.
Capture options
Check whether the software can record the full display, a selected region, a window, an application or a game. OBS, for example, provides display, window and game capture sources.
Audio control
Check whether you can record your microphone and computer audio separately. If you need application-specific audio, look for software that supports individual application sources rather than only a single general audio input. OBS documents application audio capture for supported Windows versions.
Recording quality
Look at supported resolution, frame rates and output settings rather than choosing a recorder solely from a marketing claim.
Higher settings also require more from the computer. For that reason, test the exact recording setup on the computer you will use before a long session.
Editing
Decide what you actually need first. Just capture video? Or trim mistakes, add captions, adjust audio, make other edits too? Microsoft’s Snipping Tool takes one path – it can send a completed video snip over to Clipchamp for editing. Dedicated recording applications often take a different one, folding capture and editing into a single workflow instead.
Ease of use
A beginner may benefit from a recorder with fewer configuration steps. An experienced creator may prefer detailed controls over scenes, sources, audio and recording output.
The best fit is therefore determined by the workflow, not by the longest feature list.
Compatibility
Before installing anything, look at what your system actually needs – operating system, hardware, all of it. Take OBS Studio. It works across Windows, macOS, and Linux, but that doesn’t guarantee your specific machine meets what it needs. Pull up the current requirements and download options for your device first. Skipping that step is how installs go sideways.
Also check whether a feature you need is available on your particular operating system version or edition.
Common Screen Recording Mistakes
Several recording problems can be avoided with a short preparation routine.
Recording without checking the audio
A recording can have perfect video but unusable sound. Always make a short test when audio matters.
Choosing the wrong capture source
If you need one application but select the wrong window or source, the final recording may contain something different from what you intended.
Using unnecessarily high settings
Higher resolution or frame rates can increase the workload on the computer and the size of the resulting recording. Match the settings to the purpose of the video.
Forgetting storage space
Long recordings create larger files. Check available storage before starting a long tutorial, lesson or gaming session.
Skipping the test recording
This is one of the easiest mistakes to prevent. OBS recommends testing the recording setup before an important session, and the same principle applies to other recording software.
A Simple Screen Recording Workflow
For most recordings, use this sequence:
Plan → Select source → Configure audio → Test → Record → Review → Edit → Export
First decide what the viewer needs to see. Then select the appropriate display, window, game or screen region.
Next, configure the audio. If narration is required, check the microphone. If the video needs computer or application sound, verify that source separately.
Make a short test. Watch and listen to it.
Only then record the full session.
This approach solves an important problem with screen recording: finding technical problems after you have already spent an hour recording.
Frequently asked questions
1. What screen recording software should beginners look for?
Beginners should look for software that supports the exact capture source they need and has straightforward audio controls. Windows 11 users can start with Snipping Tool for selected-area recordings, while Xbox Game Bar provides quick app and game recording.
2. Can screen recording software record audio?
Yes. What kind depends on the software, the version, and the configuration. Microphone audio. Computer audio. Audio pulled from a single application – any of those, sometimes all at once. Check the tool’s current documentation first. Then make a short test recording before you trust it for anything important.
3. Is screen recording software free?
Some of it, yes. OBS Studio’s a good example – free, open source, no catches. Windows has options built right in too. Other tools go the paid route instead, with licenses or subscriptions unlocking extra features.
4. What is the difference between screen recording and screenshots?
A screenshot is a still image, just one frozen moment of your display. Screen recording is different – it runs over time, capturing activity as it happens and saving the whole thing as video. Windows’ Snipping Tool actually handles both, screenshots and video snips alike.
5. Can I record my screen without installing software?
Yes, depending on your Windows version and the recording you need. Windows 11’s Snipping Tool can record a selected screen area, while Xbox Game Bar provides a built-in recording feature for compatible screen-recording workflows, especially games and apps.
6. Can screen recording software record gameplay?
Yes. Xbox Game Bar can record games, while OBS Studio provides a Game Capture source on Windows. The better option depends on whether you need a quick clip or more control over sources and audio.
7. Can screen recording software record a webcam too?
Some screen recording applications support webcam capture alongside the screen. OBS Studio supports video capture sources for webcams and capture devices, allowing them to be added to a recording scene.
8. What should I check before recording my screen?
Check the capture area, microphone, computer audio, available storage and recording settings. Then make a short test and play it back before starting the full recording. OBS’s official setup guidance also recommends testing your recording configuration first.
How do I choose screen recording software?
Choose based on what you need to capture, the audio sources you need, your required video quality, editing requirements, operating system and how much configuration you are comfortable managing.
For a simple Windows recording, built-in tools may be enough. For multi-source tutorials, advanced audio or gaming workflows, software such as OBS Studio provides more control.
The right screen recording software is the one that matches the recording you actually need to make. Start with the capture source and audio requirements, test the setup for a few seconds, then choose additional features only when your workflow requires them.