Published: September 30, 2026
Last Updated: September 30, 2026
A PDF can become surprisingly large when it contains high-resolution images. Scanned pages can do it too. And so can embedded fonts or other document data. The safest way to reduce its size is to start with a moderate compression method. Check what is taking up space. And increase compression only when necessary.
Don’t chase the smallest possible file. Make the PDF smaller, but keep the text readable. Keep images clear enough for their intended use. Keep the document functional, too.
Quick Answer: To compress a PDF without losing noticeable quality, use the lightest compression that meets your file-size goal. Start with lossless or moderate optimization when available. Especially for important documents. If images are responsible for most of the file size, reduce their resolution or compression level gradually. Then open the new PDF. Check text, images, links, pages, and layout before using it.
1. Why Do PDF Files Become So Large?
PDFs can contain much more than visible text. Images, scanned pages, fonts, forms, graphics, metadata, and other internal data can all contribute to the final file size.
Images are often one of the biggest factors. A PDF created from photographs or high-resolution scans may contain far more image data than is necessary for normal screen viewing.
Scanned PDFs can be particularly large because each page may be stored primarily as an image. A 50-page scanned document therefore has many large image objects instead of a small layer of native text.
Fonts can also add to the size of some PDFs. This happens most when several fonts or larger font resources are embedded.
Internal structure matters too. Adobe’s PDF space-usage analysis can show how much space different elements occupy. Images, fonts, forms, comments, and other content all count.
Start there. Find out what is large before deciding how aggressively to compress the file.
Why file size varies so much
Two PDFs with the same number of pages can have completely different file sizes.
For example:
- A text-only report may be relatively small.
- A photo-heavy brochure may be much larger.
- A scanned document can become large because every page contains image data.
- A design file may contain embedded fonts, graphics, and other resources.
- A PDF that has already been optimized may have little unnecessary data left to remove.
This is why one compression setting cannot be ideal for every PDF.
2. How PDF Compression Reduces File Size
PDF compression works by reducing redundant or unnecessary data and, when required, reducing the amount of image data stored in the file.
There are two broad approaches to consider.
Lossless optimization
Lossless methods reduce redundancy without intentionally discarding image information.
Depending on the PDF and the software being used, optimization may clean up unnecessary objects, improve internal compression, or manage other document resources.
This approach is useful when preserving the document exactly is more important than achieving the smallest possible file.
Lossy compression
Lossy compression can reduce the file size further by removing some image information.
For example, a compressor may reduce image resolution through downsampling or apply stronger image compression. Adobe’s PDF Optimizer documentation explains that downsampling reduces image resolution and that JPEG and JPEG2000 compression can remove pixel data from images.
This is where visible quality loss can occur.
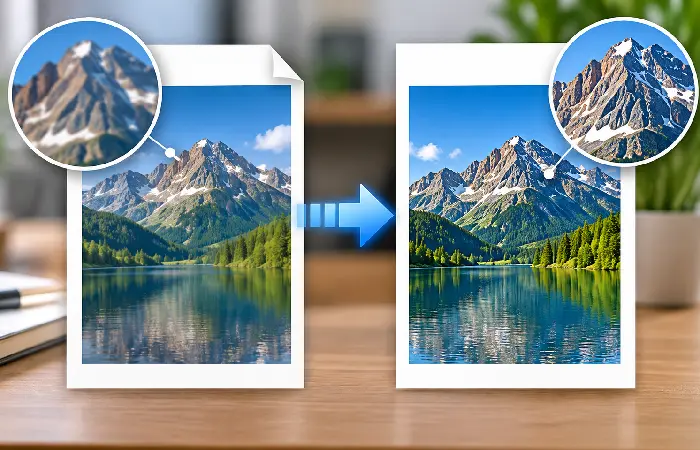
A lightly compressed photograph may still look almost identical to the original. Push the compression too far, however, and you may notice softer details, blocky areas, or reduced clarity.
What “without losing quality” really means
For most users, the practical goal is no noticeable loss for the intended use.
That is different from saying that no underlying data has changed.
If you are preparing a PDF for screen viewing, a moderate reduction in image data may be difficult to notice. A document intended for high-quality commercial printing may require much more careful treatment.
So before compressing, decide where the PDF will be used:
| Intended use |
Priority |
| Email or messaging |
Smaller file with readable content |
| Website upload |
Smaller size and clear screen viewing |
| Online form or portal |
Meet the file-size limit without damaging important content |
| Internal document sharing |
Good readability with reasonable file size |
| Professional printing |
Preserve the image and output requirements specified for the job |
| Long-term archive |
Preserve important information and document integrity |
The right balance depends on the document and its purpose.
3. How to Compress Images Without Making Them Blurry
If images are responsible for most of the PDF’s size, image optimization is usually where the largest changes happen.
The mistake is to choose the strongest compression setting immediately.
Instead, use a gradual approach.
Step 1: Start with the least aggressive setting
If your PDF software offers compression levels, begin with a setting designed to preserve quality.
Create a compressed copy rather than replacing the original.
This gives you a safe version to compare against the source.
Step 2: Check the image-heavy pages
Do not judge the result only from the first page.
Look at pages containing:
- Photographs
- Screenshots
- Charts
- Fine diagrams
- Small labels
- Detailed scans
- Text embedded inside images
These areas reveal image-quality problems more easily than ordinary paragraphs.
Step 3: Reduce image resolution only as much as necessary
High-resolution images can contain more detail than the final PDF needs.
Adobe’s PDF Optimizer provides separate image controls for color, grayscale, and monochrome images, including downsampling and compression options.
The important point is not to copy a single resolution number for every document.
A screen-only PDF, a scanned document, and a print-ready brochure have different requirements.
Step 4: Avoid repeated aggressive compression
If an image has already been compressed with a lossy method, compressing it again and again can backfire. Visible artifacts can become more noticeable.
Keep your original PDF. Work from it when you need to create another optimized version.
Step 5: Compare the important details
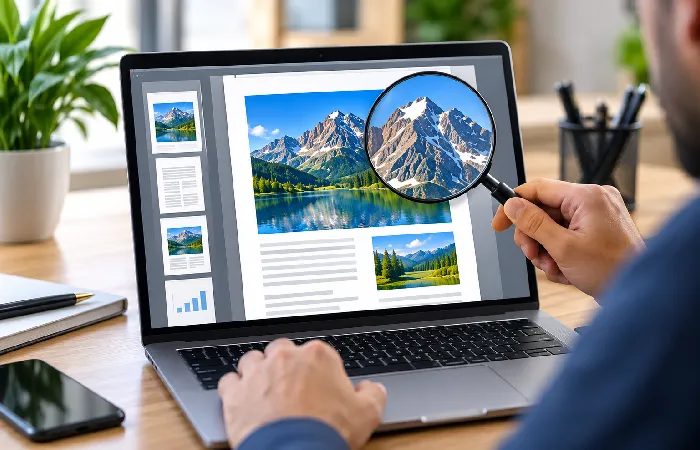
Open the original and compressed files side by side.
Zoom into the areas that matter most.
Check whether:
- Photos still look natural.
- Small text inside images remains readable.
- Lines and diagrams remain clear.
- Screenshots are still understandable.
- Fine details have not disappeared.
If the images look worse than necessary, return to the original and use a less aggressive setting.
4. How to Reduce PDF Size While Keeping Text Clear
Text-heavy PDFs require a slightly different approach from image-heavy files.
If the PDF contains real selectable text, reducing image quality is not necessarily the first thing you should change. First determine whether images, fonts, or other PDF elements are actually responsible for the file size.
Adobe’s optimization tools can work with images, fonts, transparency, and other PDF elements rather than treating the entire document as one large image.
Keep native text as text when possible
A digitally created PDF usually contains text that can be selected and searched.
If the document is converted into page images, the file may behave differently. It can become harder to search or copy.
Matters most for reports, invoices, forms, manuals, and other documents where users need to select text.
Be careful with scanned PDFs
A scanned PDF is different because its pages may primarily consist of images.
Compression can therefore still affect the visual appearance of the text. The words themselves haven’t been stored as normal editable text.
If the scan contains small characters, signatures, stamps, diagrams, or fine lines, use a lighter compression setting. And inspect those pages carefully.
If you need searchable text from a scanned document, check the OCR text layer. Make sure it still works after optimization.
Use a built-in optimization workflow when available
If you use Adobe Acrobat, its current desktop workflow includes Reduce File Size for straightforward PDF compression. Acrobat also provides more advanced optimization controls for users who need greater control. If you want to handle compression alongside other PDF tasks on a PC, our guide to choosing a PDF editor for Windows covers editing, page management, OCR, and other Windows-based PDF workflows.
For a simple job, start with the standard reduction option instead of changing advanced settings without knowing what they do.
When advanced optimization is useful
Advanced controls become more useful when a PDF remains too large after basic compression.
You may then be able to identify whether images, fonts, transparency, or other document elements are responsible for the remaining size.
This is more precise than repeatedly selecting a stronger compression level.
5. How to Check Quality After Compressing a PDF
Compression is not finished when the smaller file is created.
You should verify the result before sending, uploading, printing, or replacing the original.
1. Check the file size
Confirm that the new PDF actually meets your target.
If a website requires a maximum file size, check the exact size of the compressed file rather than assuming the compression worked.
2. Check the text
Open several pages and inspect the text at normal reading size.
Then zoom in on smaller text.
Look for:
- Missing characters
- Strange symbols
- Unusual spacing
- Missing fonts
- Text that is difficult to read
- Pages that fail to render correctly
3. Check images
Inspect photographs, screenshots, diagrams, and scanned pages.
Pay special attention to pages with small details.
If an image is now visibly blurry, return to the original and use a lighter compression setting.
4. Check the document structure
Make sure the important parts of the PDF still work.
Check:
- Page count
- Page order
- Links
- Bookmarks, if important
- Forms, if applicable
- Search and copy functions
- Orientation
- Page layout
A PDF can be smaller but still unsuitable if an important function has been lost.
5. Check printing if the PDF will be printed
Do not assume that a setting suitable for screen viewing is also suitable for professional printing.
Adobe specifically notes that print workflows may require checking the printer or print vendor’s recommended settings before compression.
If the document is important for printing, keep the original high-quality version and test the compressed copy before sending it to production.
A simple quality-check workflow
Use this sequence:
Original PDF → Compress a copy → Check file size → Check text → Check images → Check functions → Confirm intended use → Send or upload
If the result fails any important check, go back to the original and use a less aggressive compression setting.
What if the PDF barely gets smaller?
That does not necessarily mean the compressor is broken.
A PDF that is already well optimized may have little redundant data left to remove.
Likewise, a file may be large because of a particular element that basic compression does not address effectively.
In those cases, identifying the largest components can be more useful than repeatedly applying stronger compression. Adobe’s space-usage tool is designed specifically to show which PDF elements are consuming the most storage.
Final Takeaway
The safest way to compress a PDF without noticeable quality loss? Compress according to what the file contains. Don’t just pick the strongest available setting.
Start with moderate or lossless optimization where appropriate. If images are responsible for most of the file size, reduce their resolution or compression gradually. For scanned documents, pay particular attention to small text and fine details. Always keep the original and inspect the compressed copy before using it.
The goal is not the smallest PDF possible. It is a PDF that is small enough for its purpose while remaining clear, readable, and functional.
If you need to work with PDFs beyond compression, our PDF Editor guide covers the wider range of PDF editing tasks.